
Monotub Guide
Supplies You'll Need
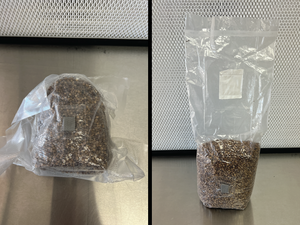
Included in Your Order:
• Inflatable monotub
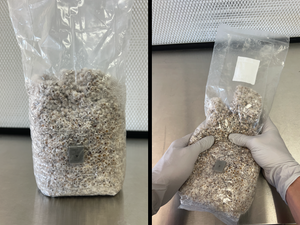
• 2 lb grain bag
• 4 lb substrate bag
Not Included:
• liquid culture or spore syringe (see below for purchasing info)
Recommended:
• 70% isopropyl alcohol
• Latex gloves (optional)
• Still air box or flow hood
• Silica gel packs
• Dehydrator
Where to Buy Liquid Culture and Spores:
You can find these items available from many online vendors.
We recommend lablinksupplies.com. Use code SURF10 for 10% off!
Step 1: Prepare Your Work Area
1. Thoroughly wash your hands before putting on gloves.
2. Clean your hands and workstation with 70% isopropyl alcohol.
Step 2: Inoculate the Grain Bag
Note: We recommend that you perform this step inside a still air box or in front of a flow hood.
1. Carefully remove the grain bag from the outer vacuum bag.
2. Hold your grain bag by the top and gently tap it on your work surface so the grain settles and air enters the filter patch.
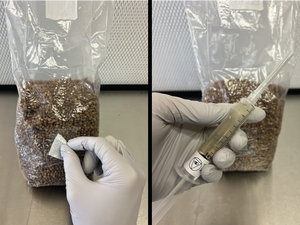
3. Sanitize the injection port with 70% isopropyl alcohol.
4. Attach a sterile needle to your spore/liquid culture syringe.
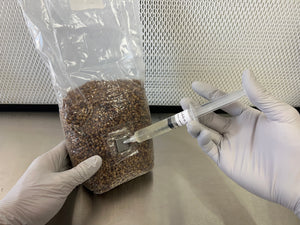
5. Carefully insert the needle into the injection port and inoculate the bag with 10ml of liquid culture or spore solution.
- If you're using liquid culture, shake the bag thoroughly to evenly distribute the liquid. This will take 7-10 days to fully colonize.
- If you're using spores, aim to inject all the liquid in a single spot and do not shake the bag. This will take 2-3 weeks to fully colonize.
STORAGE:
Place your grain bag in a clean area off the ground, away from direct sunlight, at a temperature range of 72-82°F. Temperatures in the high 70s to low 80s will result in faster colonization, while anything lower than 72°F will slow down the process.
Step 3: Break and Shake at 20% Colonization.
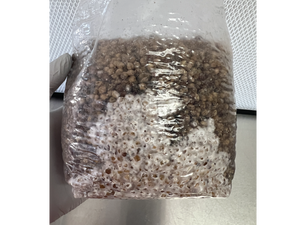
1. Break apart the colonized sections of the grain bag.
2. Shake the bag until the mycelium is evenly distributed.
3. Place the bag under the same conditions as before. Allow the mycelium to fully colonize, this will take an additional 3-7 days.
Step 4: Prepare your Monotub
Once your grain bag is fully colonized it’s time to prepare your monotub.
You can tell that the grains are fully colonized when they are entirely covered in white mycelium with no remaining uncolonized areas.
1. Inflate the monotub by using an air pump or by blowing into the valves.
2. Wait 20 minutes for the monotub to gain its shape. You may need to add some more air.
3. Properly secure the air valves by closing and pushing them into the body of the monotub.
4. Disinfect the inside of the monotub and one tub liner with 70% isopropyl alcohol.
5. Place the tub liner in the monotub.
Step 5: Fill the Monotub with Grain and Substrate
1. Repeat items outlined in Step 1 to minimize the risk of contamination.
- Thoroughly wash your hands before putting on gloves.
- Clean your hands and workstation with 70% isopropyl alcohol.
2. Break up your colonized grain bag by firmly pressing it against a flat surface. Ensure all chunks are broken up and mix the bag thoroughly.
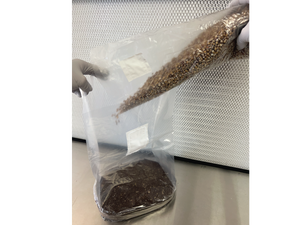
3. Cut open the top of both the grain and substrate bags right below the heat seal. Pour your broken-up colonized grain into the substrate bag.
4. Twist and hold the top of the bag closed and shake to combine.
5. Pour the mixture into the tub liner ensuring to fill in the corners and sides.
6. Create a flat even surface without compressing the mixture.
7. Fill the air holes with the included blue plugs and secure the lid.
8. Place the monotub off the ground, away from direct sunlight, and at room temperature 72-76°F.
9. Allow the substrate to colonize for 5-7 days before initiating fruiting conditions.
Step 6: Fruiting Stage
Once your monotub is fully colonized, it's time to introduce fruiting conditions.
You can tell the substrate is fully colonized when there is visible white growth throughout, and the mixture forms a solid, dense cake.
1. Replace the blue plugs with foam filters. Remove the lid and fan the inside of the monotub.
2. Replace the lid and move the monotub to a room with good airflow and indirect sunlight. If using grow lights, opt for 6500k bulbs set to a 12/12 hour cycle timer.
3. The substrate will begin to pin in about 5-7 days; after that, expect fully grown mushrooms within 3-5 days.
Step 7: Harvest Mushrooms!
The best time to harvest your mushrooms is once the cap begins to open and the veil tears.
1. Remove the lid and carefully slide the substrate and mushrooms out.
2. Harvest your mushrooms by lightly twisting and pulling at the base of the stems.
3. (Recommended) Dry your mushrooms in a dehydrator.
4. Store your dried mushrooms in an airtight container with a silica gel pack.
Step 8: Rehydrate for Multiple Flushes
Once your mushrooms are harvested, you can rehydrate your cake for consecutive flushes. Each grow kit can produce two to three flushes.
1. Pour 8-12 cups of cold water into the monotub covering the surface of the substrate.
2. Let the cake soak for 4-8 hours, then pour off the excess water.
3. Secure the lid and place the monotub back in your grow area under fruiting conditions.
4. Wait until you have a second flush of mushrooms, this will take 5-7 days. Repeat this process until the cake no longer produces.
If you have any additional questions feel free to reach out to info@surfinspores.com.